Confession time: I have a thing for old furniture. There’s just something about the craftsmanship and charm of an older piece that simply can’t be beat. And if that weren’t enough, then there’s the price tag. I find it completely exhilarating to snag a nightstand for $15 off Craigslist, freshen it up with some chalk paint and create a one-of-a-kind storage piece. This kind of furniture adds character to a room and make for super affordable Project Refresh projects. (If you want to add a chalk paint project to your Project Refresh list, check out this blog post with a complete rundown on how to chalk paint.)
Today’s project attests to my long time love of refreshing old furniture. This little bench has lived in my entryway for nearly two decades! Before that, it lived in my post-college apartments. So it’s a long-time loved piece, made even more special because I found it on a trip to Michigan many years ago. It’s functional and filled with memories. You can’t beat that.
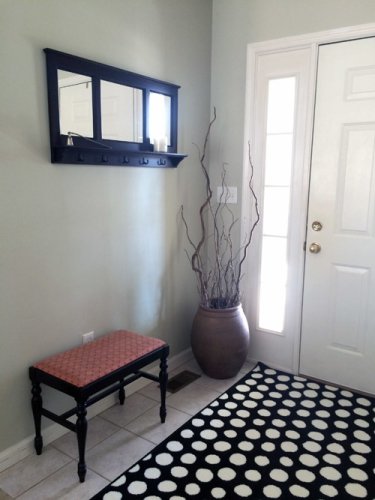
But…I’ve grown a bit tired of the fabric. I want to infuse more pops of color into my home as part of my overall Project Refresh mission. And this fabric is just a bit too drab. So it was time to recover the bench with some fresh new fabric. Here’s how I did it:
Step 1: Go fabric shopping. I found fabric with a bit more color and personality at Hobby Lobby. The total investment was around $5, making this a super affordable Project Refresh project.

Step 2: Remove the seat. This actually turned out to be trickier than I imagined. The screws holding the seat into place had gotten a bit stripped over the years. (Let’s just say I wasn’t the first person to recover this bench!) But ultimately I was able to free the seat from the legs.
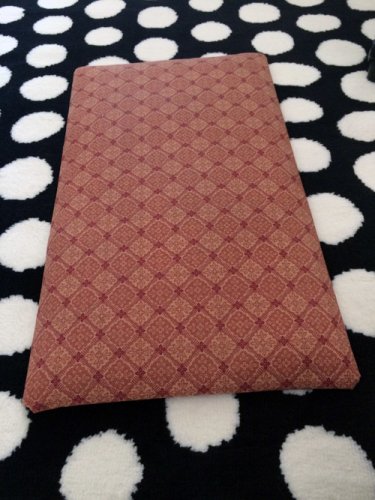
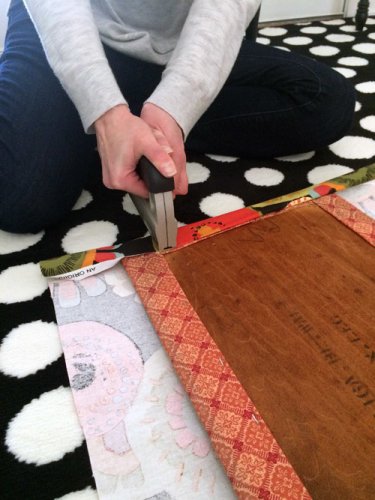
Step 3: Recover the seat. Because my fabric was dark, decorator fabric, the old fabric didn’t show through, so I decided not to remove the old fabric before adding the new. This saved me a bit of time and hassle. Before covering, I pressed out the wrinkles and selected which part of the fabric I wanted showing. I opted for sections with the most blues and greens. From there, I cut the fabric to the appropriate size and stapled the fabric to the seat.
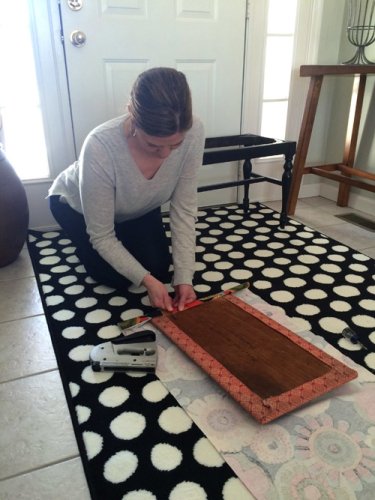
Step 4: Reattach the seat to the legs. Again, trickier than expected, but with Jay’s help, we got ‘er done.
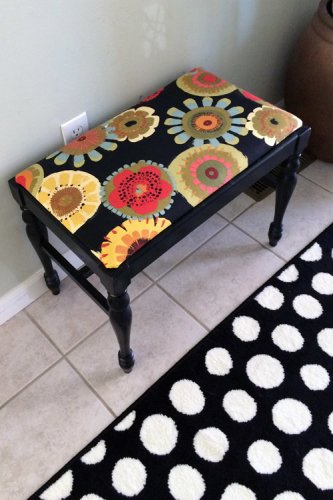
I’m really happy with how this quick and inexpensive Project Refresh project turned out. But it is funny how doing one thing leads you to notice more things you’d like to do. Ultimately, I want to change the paint color in my entryway and great room. (So if you have any paint color suggestions, I’d love to hear them.) Before that though, I definitely need to touch up the white trim paint. That one is going on the Project Refresh list pronto!
So there you have it, a simple Project Refresh project that adds a bit more color and personality to the entryway with minimal time and cost. I’d love to hear about your latest projects, as well as paint color suggestions. Do you have a color in your home that you absolutely love? Please share!
![]()

Love this project and your fabric choice. What a difference!
Thanks, Jen! It makes me happy every time I see it. 🙂
Aby that is a gorgeous transformation.
For color ~ which way does the room face? does it get north/south/east/west light? your fabric has so many pretty colors to match to
Thank you, Hanah! The room faces west. We have an atrium ranch so there is a lot of bright afternoon light. Can’t wait to hear your thoughts.
Hi Aby Love the look of the new fabric. Yup you’re right , one thing will lead to another, so paint away! Salmon would be my choice. It plays well with black and there are several shades of salmon, so have Fun discovering which one. Then that will lead to new pillows for the sofa. lol. The Fun never ends.
Thanks for the idea, Norma! I’m with you on the new sofa, pillows, etc. 🙂
FUN update!! I love the bold fabric.
I think the light green in the fabric would be a welcoming touch to your entry walls.
Thanks, Petra! Maybe like the green in my office? Is that what you’re thinking?
thank-you4sharing! love it, looks like you paid a fortune for it at world market or winners now. staple guns areawesome
You made my day, Betty! Thank you. 🙂
Inspiring project! Love the fabric choice. A golden yellow would be my choice for the wall.
Thanks for the suggestion! That would be a great choice with this fabric…but I have a ton of light yellow in my kitchen and just about my entire lower level. Would love to hear any other ideas!
Those colors are so bright and cheerful – I love the shade of blue, I would play off that in a lighter shade!
This is quite innovative and easy to be done. I will try it for my home this Christmas. The fabric selection goes well with your carpet. You can even give your old furniture a new look by decorating it with candles and table lamps.
Really good post – new fabric always makes such a difference!