A few of you have asked for more info on how to make the birthday banners. This is a fun and simple project that could be used for all sorts of events and holidays. I’m thinking of making one for Valentine’s Day…we’ll see. Maybe I’ll go super simple and just make an L-O-V-E banner. 😉
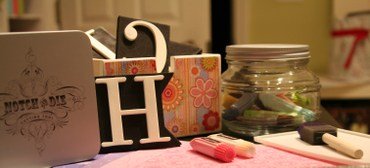
To make the banner select some basic card-stock and coordinating patterned paper. Then, you’ll need a spool of ribbon (mine was Orfray from Wal-Mart), foam alphabet stamps (I used Making Memories, I think the Simply Fab set. The letters in the set I used range in height from about 2 ½” to over 3 ¼” tall just for reference); paint (I used paint from Junkitz). For tools, I used the Basic Grey Notch and Die cutting system and a foam paint brush. Oh, and you’ll need some adhesive and a paper trimmer.

Putting the banner together is pretty simple. Use a paper trimmer to cut your squares. The outer squares measure 6” x 6” and the inner squares are 4” x 4”.
Adhere the 4” squares to the center of the 6” squares. Then, use paint and stamps to create your message. Allow paint to dry.
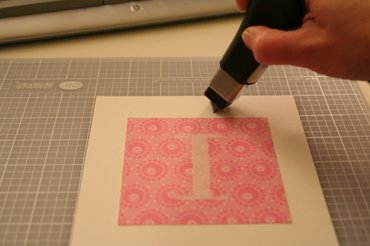
Next, use the notch tool to make two vertical slits in the center of each 6” x 6” card-stock square.

The two slits are approximately an inch apart. Once you’ve made your notches, thread your ribbon through the slits of each card-stock square (carefully so the slits don’t tear) and viola! you’ve got yourself a banner.

To hang, I used simple map pins pushed right into the dry wall. (Tiny holes, up high. It worked for me.)
Like I said when I made the first banner…I wasn’t quite up for figuring out how to deal with the triangle shaped banners. If you know how to make that kind (or have other ideas for how to attach the ribbon, because threading it through the slits is a bit time consuming) please share! I love hearing your ideas.

Super cute! Here’s a tutorial on the pennant banners: http://www.splitcoaststampers.com/resources/tutorials/pennant_banner/
Thanks for sharing!
LOVE your blog!
I was so inspired by your banner that I made one for our daughter coming home from college for Christmas. It said Merry Christmas Jennifer and was put above her bed. Way too cute. Don;t know how to post a picture for you to see it, or I would.
instead of threading ribbon, how about folding top of square over and stapling it? Could be a fun look and much quciker. Or even stapling it to the ribbon–you wouldn;t have to worry about folding it ove then!
Thank you for sharing how to make banners. I am a professional organizer and I make videos on how to organize. This will be a great banner to have with my business name behind me when I video. I plan on reinforcing the holes with packing tape on the back to minimize the chance of tearing. Your banners are creative and beautiful.
There’s a neat little Projects Now class at BPS with templates for the triangle banners — Lisa Cohen’s A Banner Day!
http://www.bigpicturescrapbooking.com/bannerday.php
Wow.. great idea! I definitely will want to use that in the future!!
My friend and I made a pennant banner that was SO COOL it has been used over and over. We made a prototype triangle, and just cut out a hundred (or maybe not that many!) black triangles out of construction paper. We painted (HAND PAINTED!!) a skull in white acrylic on every triangle, used a hole punch to punch the corners and strung ’em up with black silk ribbon. I keep it stored carefully folded, like a stack of triangles with the ribbon poking out at the sides, and I plan on buying those binder-paper hole reinforcements before the next pirate birthday. It looks so good. We also made a HUGE flag of course!
My friend and I made a pennant banner that was SO COOL it has been used over and over. We made a prototype triangle, and just cut out a hundred (or maybe not that many!) black triangles out of construction paper. We painted (HAND PAINTED!!) a skull in white acrylic on every triangle, used a hole punch to punch the corners and strung ’em up with black silk ribbon. I keep it stored carefully folded, like a stack of triangles with the ribbon poking out at the sides, and I plan on buying those binder-paper hole reinforcements before the next pirate birthday. It looks so good. We also made a HUGE flag of course!
wow, what a cool idea.
so much better than the banners you purchase from stores.
I made a pennant banner for Christmas (“Happy Holidays”) and I just put a Stampin’ Up jumbo eyelet on the two top corners, and threaded the ribbon through that way. The ribbon showed between the triangles, but was behind the pennant pieces… I hope this makes sense! -Shelley
http://www.frannieandme.blogspot.com/
Here’s my version of a birthday banner.